A few weeks ago, I tweeted about an open-source deal memo creation tool for VCs. While the main challenge has been convincing investors to share their data, I quickly realized I also needed hands-on experience with fine-tuning techniques like Supervised Fine-Tuning (SFT). So, I decided to dive in. Here are my key notes and learnings from my first attempt at fine-tuning, using a small model—Gemma 3 (1b).
Listing Steps To Do / Constructing A Project Plan
My original goal was to get to a large language model that could sufficiently mimic the reasoning of an investor preparing a deal memo. That’s a tall order, but thanks to Gemini 2.5 Pro I avoided complicating it too much and limited this exercise to practicing a complete end-to-end SFT workflow.
Lately, I’ve been learning through top-down exploration rather than the typical bottom-up approach. But to ensure that I do not over rely on AI in the process, I make it a point to break down each step of the project on my own before seeking AI feedback. This approach has served me well to improve my intuition about setting up technical projects and recognizing what constitutes a complete unit of work.
For this particular exercise, the steps I noted (after going through a couple of papers on fine-tuning reasoning models) were:
Step 1: Setting Up the Notebook and Hugging Face Hub
I was not going to make the same mistake that I made with delaying getting onto Github with Hugging Face. Honestly the HuggingFace notebooks on instruction tuning SmolLM2 here and here were a godsend because both of them gave me the boilerplate code to get started.
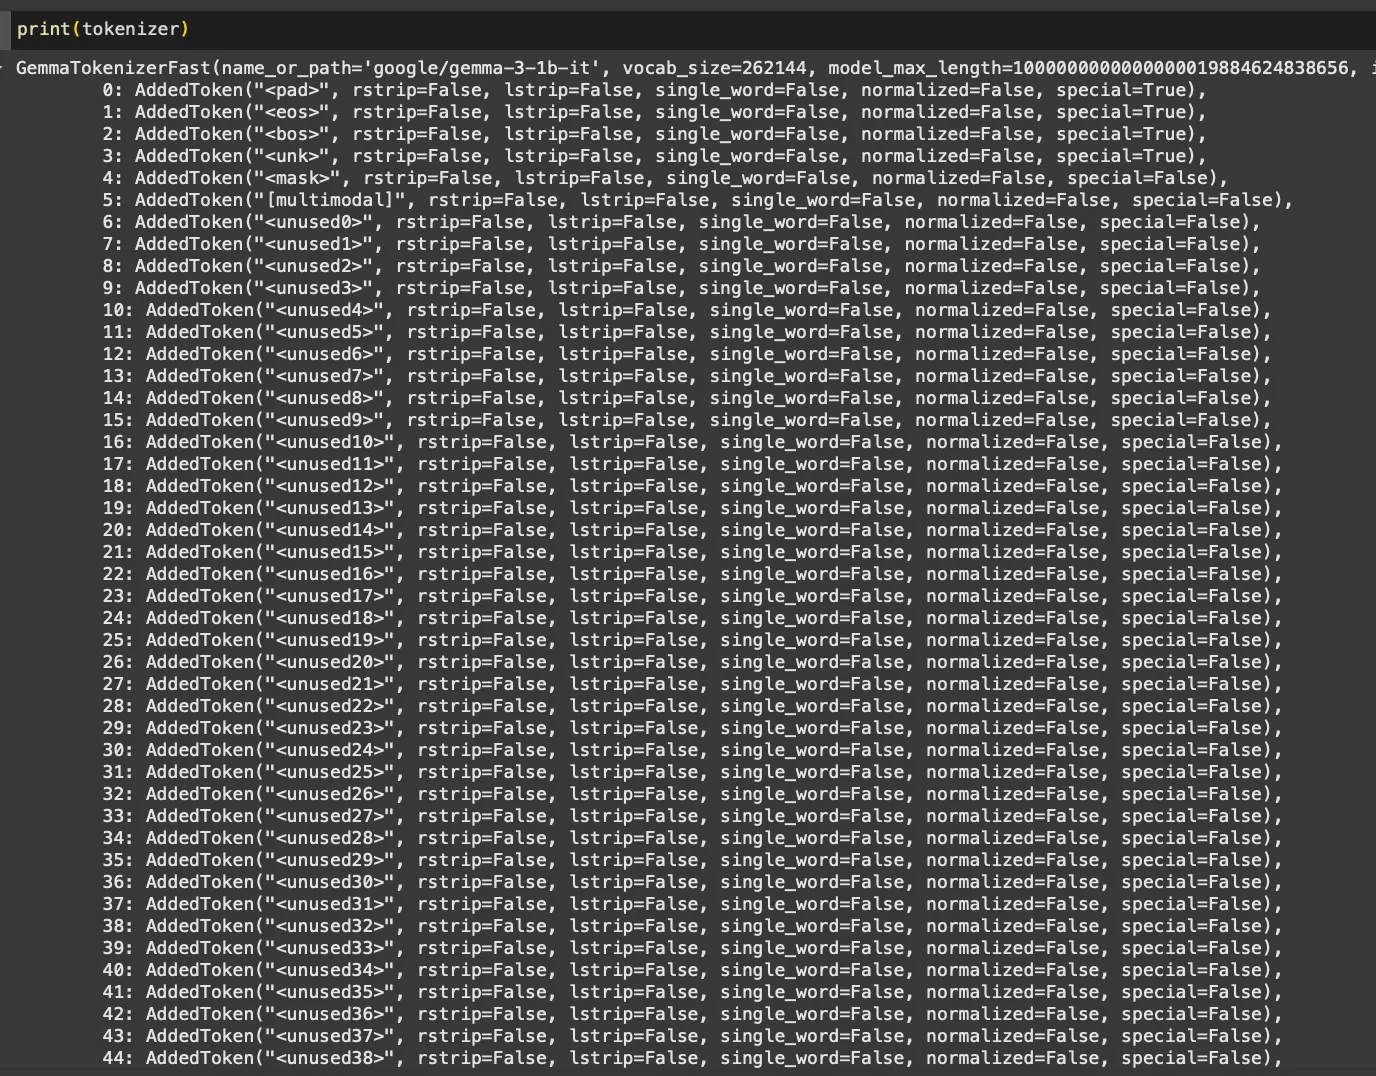
Step 2: Load Model and Tokenizer
Unlike interacting with tools like ChatGPT, where tokenization remains hidden, here I got to see firsthand how words translate into tokens. Loading a model-specific tokenizer and exploring its special tokens was insightful. Additionally, printing the model specifications and reviewing its attention modules was like peeping into the biology of the model.

Step 3: Setup Fine-tuning Dataset
Wrangling text data into specific formats is always satisfying (I blame my literary background!). I selected the ScienceQA dataset, one of the earliest datasets leveraging chain-of-thought reasoning. To keep it manageable initially, I focused exclusively on economics questions without images.
| ScienceQA Full | Economics only | Econ w/0 image | |
|---|---|---|---|
| Train Data | 12726 | 400 | 237 |
| Test Data | 4241 | 155 | 84 |
| Validation Data | 4241 | 127 | 63 |
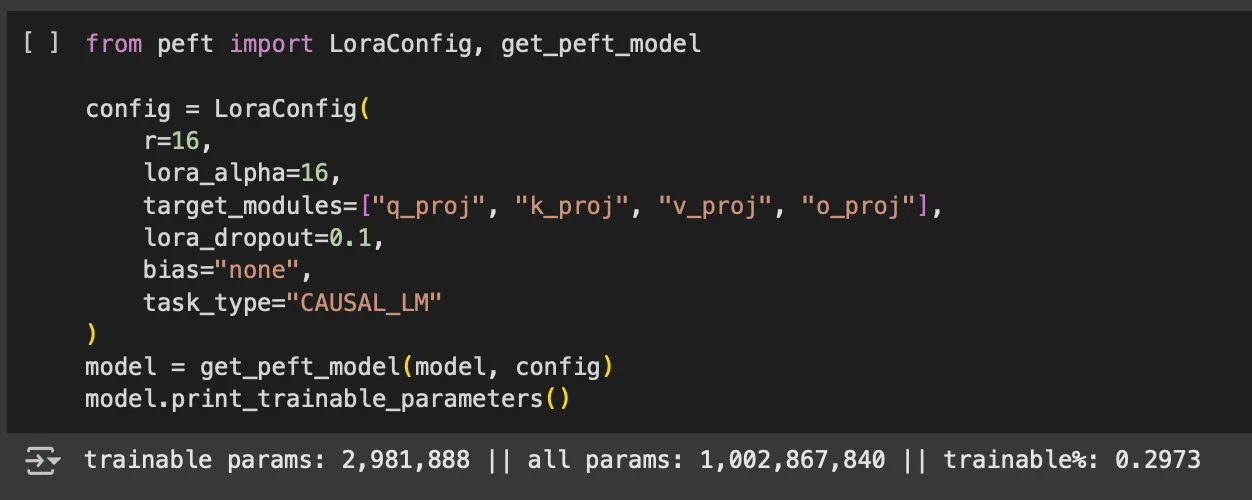
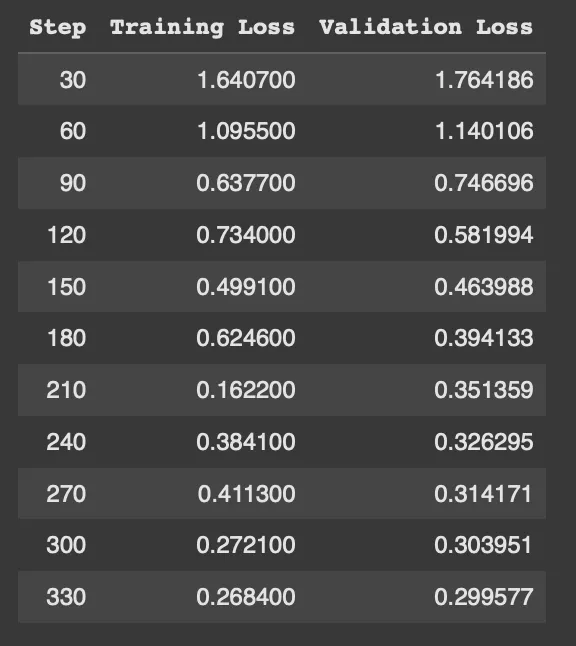
Step 4: Set Up the LoRA config, and SFTTrainer. Run Training.
This step was particularly interesting because I was largely exploring new territory. While many concepts related to the training process were familiar, configuring LoRA was entirely new. Fortunately, the Hugging Face docs on Supervised Fine-tuning Trainer (SFT) and Parameter Efficient Fine-tuning (PEFT) were clear and helpful. Youtube videos here and here clarified what was happening behind the scenes, making it easier to get started.
Step 5: Run inference on Test split. Compare base and fine-tuned model performance.
This turned out to be much more fun than I had originally anticipated. This was the first time that I set up an automated evaluation loop (for many reasons) but just seeing the base and fine-tuned model fighting it out to get to the right answers was fascinating.
Once I had the steps written down, it was just about keeping at each step and completing them one by one without losing myself in what I didn’t fully understand under the hood.
Key Learnings and Observations
Here are some general notes I made through the process about the things I learned while going:
1. Check for Special Tokens in the Model Tokenizer
Such as those for role assignments, and end and start of chat turns, etc. This is more important when you are fine-tuning a model for multiturn use cases – thankfully the ScienceQA dataset is all single-turn so I didn’t have to worry too much about this.
2. Format Input Prompts Using Chat Templates
You do not need to do this at the level of the tokenizer if the model comes with special tokens, but you still need to add those to your prompt when inputting it into the model for output generation.
3. Use .map() for Dataset-wide Changes
The .map() function turned out to be incredibly useful for making dataset-wide modifications. Initially, I hesitated to use it, feeling it might be a shortcut. Gemini 2.5 pro was kind enough to remind me that that is loser thinking and I need to stand on the shoulders of giants and just use what is given to me because the key thing is to finish the end-to-end process, not make myself feel good by reinventing the wheel.

4. Remember to Pass the PEFT Config to SFTTrainer
This was fun because I at least once started a training run on all the 1 billion parameters. Seeing the speed of it, I soon realized that something was wrong. To my surprise, I had forgotten to pass the PEFT config to the trainer. It was also fun to see the attention modules to target which in this case was just all – but I am excited to play around with this and get into this deeper.
5. Work with the Full Dataset Before Splitting
This is more a workflow insight than a technical concept. Initially, I started by isolating the training set to reorganize it into model inputs and outputs. But I quickly realized that many pre and post processing steps need to be applied uniformly across all splits. Hence, it’s better to work on the full dataset as a single object and only separate test, train, validation splits when necessary.
6. Just Run Training on a Better Device
I first thought that I could get this done on Colab’s free T4 GPU but boy was I wrong. Even just training on 237 examples for 3 epochs was coming up to 5 hours and the run kept failing cause of RAM overload even before it would reach the first checkpoint. Eventually, I gave in and bought about $12 of compute credits to use the A100 and lo and behold the training was done in about 10-15 minutes.
The other issue with the free device was that the reporting was not working great. I tried using Tensorboard and Weights & Biases, but due to the memory issues, even basic logs weren’t showing up properly. I also briefly attempted to set things up locally with a Jupyter server. It was all slow and clunky but thankfully the better device made this all much easier and comfortable. I guess this is why Nvidia is a big deal lol.
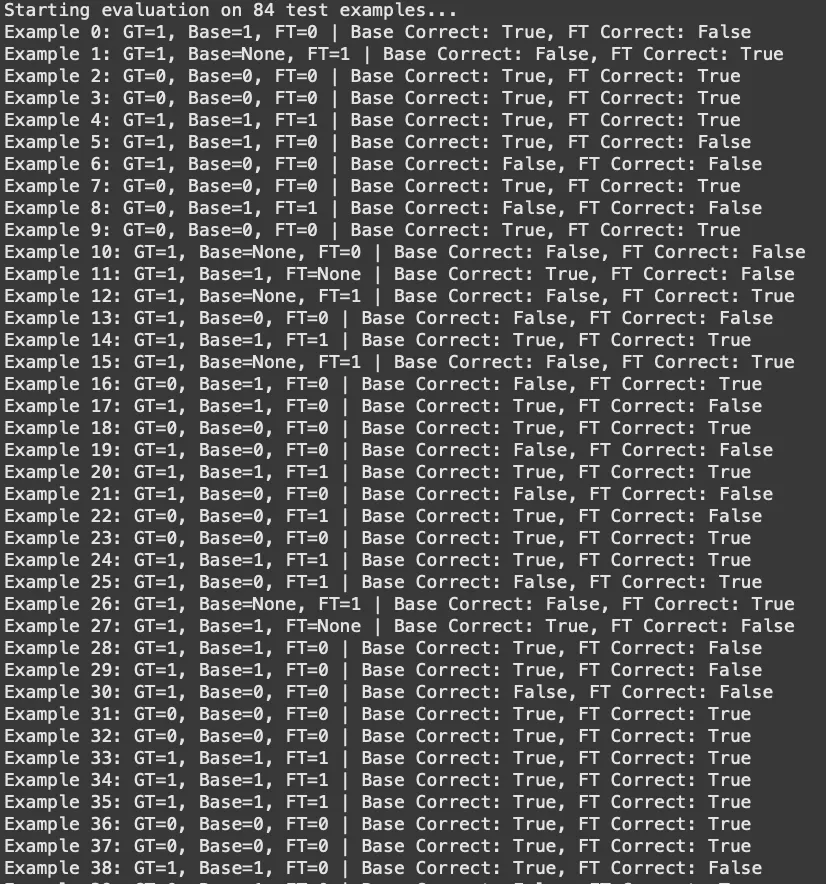
7. Run Automated Evaluations
I started by testing a few examples manually, but setting up an evaluation loop for all 84 test cases was far more effective. To my surprise (read: ignorance) the fine-tuned model had very little improvement in answering the questions right (~55% accuracy for both models), but improved in following the requested <Reasoning> <Answer> output format (reducing parse errors from 7 to 4).
Good learning that fine-tuning doesn’t always boost accuracy, but it can improve structure and consistency. And I got to this learning much faster cause I ran the 84 test set evaluation automatically and could see the results more completely.
Final Thoughts
This was a rewarding project. While I didn’t achieve anything groundbreaking model-wise, being familiar with the end-to-end fine-tuning and evaluation process for small models opens up many more possibilities for what I can do with LLMs and I am excited to keep building on this.
I am also bullish on learning this skill because it’s still undecided if locally running open models or models behind APIs and platforms will be the norm for the future of software so hey let’s go!